Development Guide
🐾 First Steps
- Create an account: GitHub
- Create an account: Discord
- Sign the CLA
- Join the Arrow Discord
- Be sure to visit the
#start-contributingchannel and give yourself a role!
- Be sure to visit the
- Set up a GPG Key
- See Sign Your Commits for instructions
🎠 Workflow
📍 Claim a Task
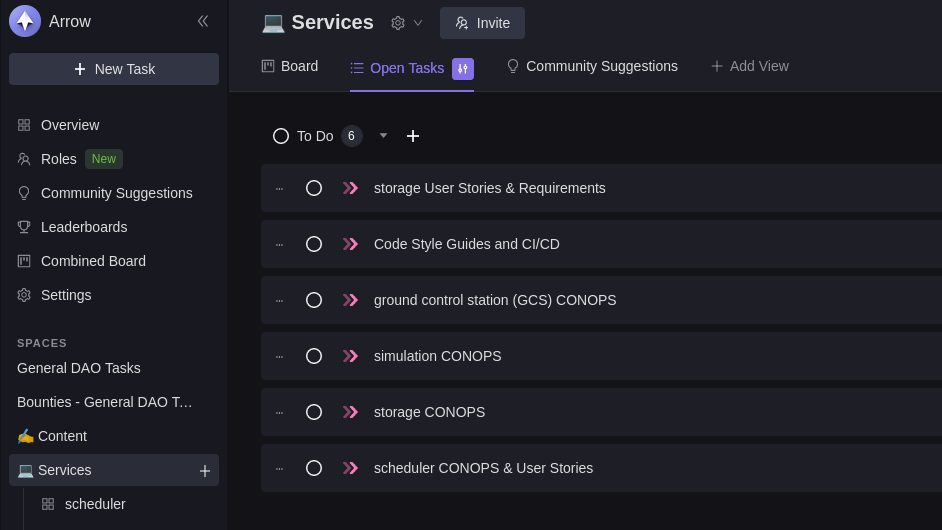
- Visit the Arrow Dework
- Sign in with your Discord credentials
- View open tasks
- Claim a task, easy as a button click!
- Some important tasks are by application only. Describe why you're a good fit for the task!
🔧 Work on a Task or Subtask
❗ See our Git Guidelines
- Clone or fork the target repository.
- If you are not a core member of an Arrow GitHub team, you will need to work from a fork.
- How to Fork a Repository
- Create a branch.
- Our branch names are generated by Dework! See our branch guidelines.
- Code!
- Be sure to follow our Code Style Guides!
- ❗ Sign ❗ your changes and push to the remote.
- Commits to all remote branches must be signed
- See Sign Your Commits for instructions on setting up a GPG Key
- Use the
-Soption to sign your commitsgit commit -S -m "Add README.md"
🏁 Push Changes
- Make a pull request targeting the
developbranch- A "Pull Request" is a public request to merge your branch into another branch
- If making edits to the website, seek to merge your PR into the website
stagingbranch instead. mainis our latest stable release.developis merged intomainat the end of every release.- How to create a pull request from a fork.
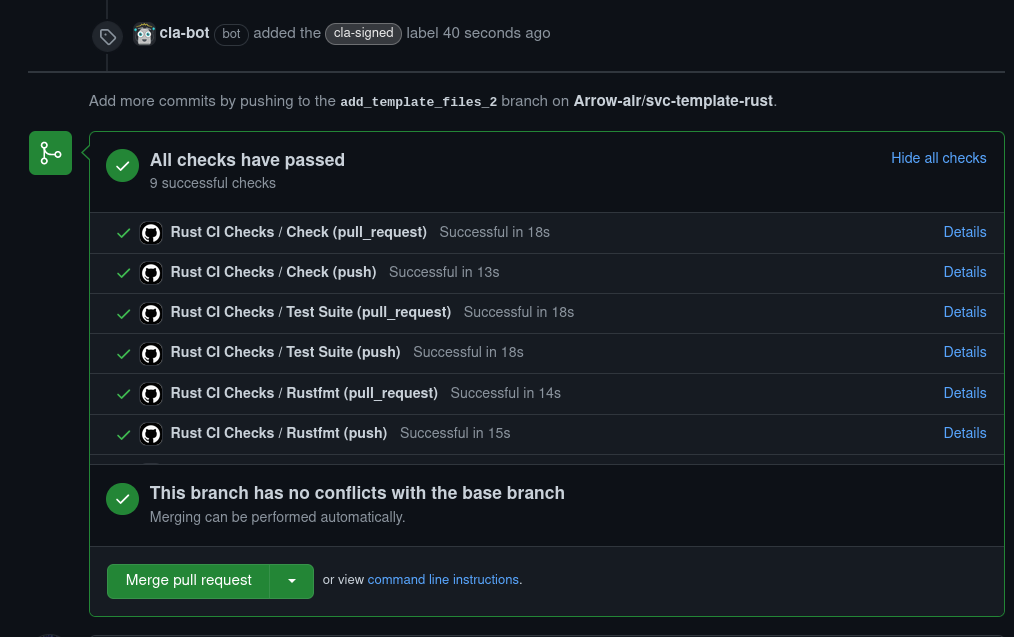
- Confirm the presence of the
cla-signedlabel.- If you haven't signed the CLA, the cla-bot will be disappointed 😠
- Confirm that the GitHub Actions checks pass.
- These checks will vary from repository to repository

- Get approvals!
- The number of approvals may vary from repo to repo.
- Approvals generally need to come from core members of the Arrow teams.
- Merge!
⚡ VS Code Extensions
These extensions are recommended:
Generic
# In VS Code Quick Open (Ctrl+P)
ext install \
bierner.github-markdown-preview \
docsmsft.docs-yaml \
stkb.rewrap \
eamodio.gitlens \
ms-vscode-remote.vscode-remote-extensionpack \
tamasfe.even-better-toml \
EditorConfig.EditorConfig
- GitHub Markdown Preview
- Includes
mermaid(uml) rendering and emoji rendering in markdown preview pane
- Includes
- docs-yaml
- Intellisense, validation for YAML files
- Rewrap
- Wrap code comments to fit within n characters
- Need to enable this in Preferences->Settings->type "Rewrap"
- 80 characters is the recommended column
- GitLens
- Hover over lines to see commit history, last author
- Remote Development
- For working over SSH
- Even Better TOML
- TOML files are used for Rust configuration
- Validation, syntax highlighting
- EditorConfig
- Override user/workspace settings with settings found in
.editorconfigfiles.
- Override user/workspace settings with settings found in
Arrow Web projects
# In VS Code Quick Open (Ctrl+P)
ext install \
esbenp.prettier-vscode \
johnsoncodehk.volar
- Prettier - Code formatter
- Auto formatting files based on .prettierrc.yaml config
- Vue Language Features (Volar)
- Syntax highlighting for .vue files
- Additional Vue development features
- When formatting .vue files, choose prettier as the default instead!
Arrow Terraform projects
# In VS Code Quick Open (Ctrl+P)
ext install \
4ops.terraform
- Terraform
- Syntax highlighting for
.tffiles
- Syntax highlighting for
🚧 Git Guidelines
🌳 Branches
Use the suggested Dework Task branch name.

- e.g.
am-smith/dw-227/rust-service-template - This links your work to a ticket
- Closing a pull request with this branch will also mark the Dework task as "Done"!
- Subtasks have their own branch names. Click on the subtask first to open up the subtask menu.
🔏 Sign Your Commits
We enforce signed commits to authenticate commits from an author.
- Security, accountability, traceability
- "How (and why) to sign Git commits" - Alessandro Segala
❗ All remote branches are protected from unsigned commits through GitHub repository settings.
Setting up a GPG Key:
- Generate a GPG Key
- Informing Git about your GPG Key
- Informing GitHub about your GPG Key
- All commits signed by default:
git config --global commit.gpgsign true
Add an -S to your commit command to sign it, e.g. git commit -S -m "Add README.md".
💬 Commit Messages
For most of the repositories, we've set up an auto-release process where commit messages will be used to generate a CHANGELOG.md file and determine the new release version. This makes it extra important to use the correct messages when committing your code. Follow the guidelines as described below, which are based on conventional commits.
<type>[(optional scope)]: <description>

[optional body]

[optional footer(s)]
- The title should start with a change
type(lower case):- build -- Changes to build process, does not include code changes, results in Patch release
- ci -- Changes to CI process, does not include code changes, results in Patch release
- docs -- Changes to Docs / .md files, does not include code changes, results in Patch release
- fix -- Patches a bug, results in Patch release
- perf -- Performance fix, results in Patch release
- refactor -- Code refactor changes, results in Patch release
- style -- Code / file formatting and style fixes, results in Patch release
- test -- Changes to Tests, results in Patch release
- feat -- Introduces a new feature, results in Minor release
- The title
descriptionshould start lower case (Add new feature) - Adding
!after thetypein the title, will indicate a breaking release. This results in a Major release. A BREAKING CHANGE notice can be added to the commit footer.
Additionally:
- Do not exceed a line length of 50 characters for commit title
- Do not exceed a line length of 72 characters for commit body
- Do not end the message with a period
Keep these in mind always, especially when squashing commits (one message).
👍 Pull Requests
- Pull Requests should target the
developbranch- For the website repository, target the
stagingbranch
- For the website repository, target the
- Keep PRs small and easy to review!
- Our reviewers may ask you to divide your PR into multiple smaller PRs.
- If the commit history is messy, recommend "Squash and Merge" when pushing in
changes.
- The squashed commit should have a thorough description of the changes added.
- The Pull Request comments should be descriptive
- A brief description of what was changed and why
- Your PR should equate to no more than one Dework issue
- Addressing multiple tickets in one merge makes it harder to debug breaking changes.
- Use
git commit --fixup <commit sha>to fix a previous commit.
📚 Repositories (Create, Modify, Delete)
Repositories are managed through Terraform.
Requests for repository management should be made to @owlot.
🔨 Makefile and build automation
All Arrow GitHub repositories are started from templates and are provisioned by Terraform to automate changes in the workflow. Templates contain a Makefile which is propagated to all repositories.
Each repository has a Makefile which uses make utility to run build targets. All make targets call specific commands from a docker container arrow-sanitychecks. arrow-sanitychecks is a docker image with linting tools needed to validate code so developers don't have to install them locally.
- they can be run separately - e.g.
make cspell-test. - or multiple targets can be run at once. This is done during pre-commit hooks or PR checks. -
make test. - or all targets to run test, build and release phases -
make all.
Makefile targets
Run make help to see all available targets or explore template Makefile
and linked Makefiles.
🔐 Admin Access
Elevated access to our various team platforms is limited.
Ping @thomasg or @owlot and describe what you want to do.
